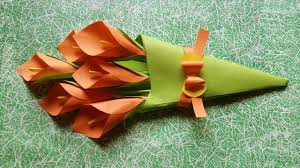
Mother's Day Craft: Paper Mâché Flower
Mother’s Day is the perfect time to create a handmade gift. A paper mâché flower is a fun, budget-friendly, and meaningful craft that any mom will love. This project is easy enough for kids and adults alike, making it a great family activity.
Why Paper Mâché?
Paper mâché is a versatile and eco-friendly craft technique that allows you to create durable and beautiful designs using just paper and paste. It’s inexpensive and provides a wonderful opportunity to personalize your gift with colors, textures, and embellishments.
Hello this is a quote
Materials Needed
Before you begin, gather the following materials:
- Newspaper strips (cut into small pieces)
- Flour and water (for paste, or you can use white glue mixed with water)
- A small balloon (for shaping the flower head)
- Acrylic or watercolor paints (various colors)
- Paintbrushes
- Green pipe cleaner or a wooden stick (for the stem)
- Scissors
- Glue (hot glue or craft glue)
- A small cup or jar (to hold the flower)
- Optional: Glitter, tissue paper, or buttons for decoration
Instructions
Step 1: Create the Paper Mâché Paste
To make the paste, mix one part flour with one part water and stir until smooth. You can also add a small amount of salt to prevent mold growth. If you prefer, you can use white glue diluted with water.
Step 2: Form the Flower Head
Blow up a small balloon to the desired size of your flower. Dip newspaper strips into the paste and layer them over the balloon, covering it completely. Smooth out wrinkles as you go. Let it dry for several hours or overnight until it hardens.

Step 3: Shaping the Flower
Once the paper mâché is dry, carefully pop the balloon inside and remove it. Use scissors to trim the edges into petal shapes, or cut slits around the edges to create a more detailed floral look. If you’d like, you can glue additional paper layers to shape the petals more distinctly.

Step 4: Paint and Decorate
Now, it's time to add color! Use acrylic or watercolor paint to decorate your flower. You can go for a classic rose look with red and pink hues, or get creative with bright, vibrant colors. Let each layer of paint dry before adding more details.

Step 5: Attach the Stem
Take a green pipe cleaner or a wooden stick and paint it green if needed. Use glue to attach it to the base of your paper mâché flower. If the base is too rough, create a small hole in the bottom of the flower and insert the stem securely with glue.
Step 6: Add Final Touches
Once the paint is completely dry, you can enhance the flower with embellishments like glitter, tissue paper for added texture, or even small decorative buttons in the center. This will give your flower a unique, handmade touch.
Presentation Ideas
Consider placing your handmade flower in a small jar or wrapping it with ribbon for a more polished look. You can even create a bouquet of different-colored flowers to make a bigger impact. Adding a handwritten note with a heartfelt message will make this Mother’s Day gift even more special.
Final Thoughts
This DIY paper mâché flower is a perfect way to express love and appreciation for your mom. It’s a gift that will last for years, just like the memories you create while making it. Plus, it’s a great way to engage in a relaxing and creative activity.
Happy crafting, and Happy Mother’s Day! 🎨🌸

